Steps in Anime Production
Steps in Anime Production
I had a few ideas on how an anime is produced, though these were from documentaries of western animation, and my own experience as a production assistant for broadcast and film as well as project management of various kinds. Nonetheless I approached my introduction to anime productions with eyes as fresh as I could make them, when TOEI showed us a video of their process as well as their public relations guy Jay Hernandez (who’s an animator himself) giving us the lowdown during our tour. I won’t be able to show you their actual ‘how-to’ video, but I can use images from Otaku no Video!
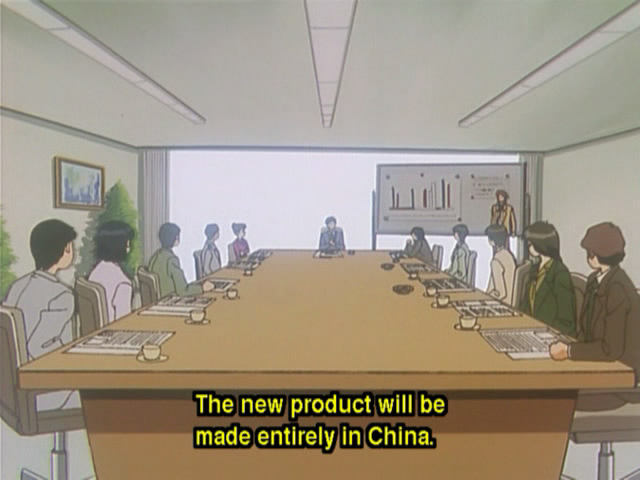
Planning is the first step, where the ideas are presented to the planning team and discussed. This stage involves the identification of the target market, and the overall marketing strategy.
I imagine that merchandising activities are also identified at this stage. The usual manufacturers and distributors are put on the short list, as well as the intended networks and potential advertising partners.
Concept Design (after which I suspect the project is shopped to networks and advertisers)
Character Design (the designer effectively ‘stalks’ people in their natural environment)
In the Background Design stage the designer effectively ‘stalks’ environments either as models or actual subjects for the background art in the animation. We’ve seen a number of settings that are very consistent with real environments, even when science fiction elements are applied, like the Ghost in the Shell movie’s Hong Kong.
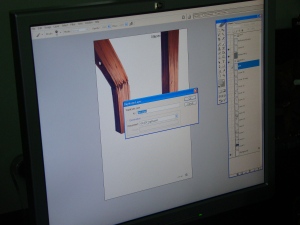
Hand-drawn images are digitized and drawn over. Here is some re-used but relevant footage to our discussion: How I drew tried to draw the above piece of wood for One Piece:
The Digital drawings are created using the RETAS PRO SUITE of animation software, gone are the days of hand-drawn cels, like how the folks at GX used to do it in Otaku no Video.
Key Animator: Keys (aka Key Poses, Key Drawings or Extremes): The keys are the extreme drawings or images of an action, produced by the animator to create the structure of the animation. One can imagine them as a starting pose of a character, and the finishing pose of the same.

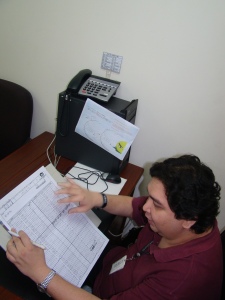

The In-between Animator is the one who draws the images that ‘fills the gaps’ between the Keys. In the images above, Jay Hernandez makes in-between drawings for the Key frames in One Piece and Fresh PreCure respectively.
Once the drawings are complete, the Color Stylist does her work, though it’s all digital now compared to the GX work on Misty May in the image above. While animation production remains an expensive venture, I imagine it to be less so – which should explain the massive number of shows that have been produced over the last decade.
The SFX Artist adds whatever special effects are used: sparkles, flashes, vibrations, sparkling bacteria… the works.
These are all put together by the Editing Staff, which under the guidance of the director, prepares the animation for the sound, voices, and music to be added.
Not really news to me, but after hearing the explanation at TOEI and watching recording sessions (site linked to may have NSFW images in its sidebar though post linked is SFW), it makes more sense to me how the scene must be produced first before the actors record their lines. The Seiyuu (Voice Actors) dub their lines next.
To match the visual SFX, Sound Effects are then mixed into the footage.
The BGM (Background Music) is selected (if already composed). Here’s a link to the translated interview from Newtype magazine of Kanno Yoko and Kawamori Shoji about their work process in creating the music for Macross Frontier. An excerpt:
Kawamori: The way ~F was made was really like a musical. I’ve heard that in musicals, the composer is involved in the storyline. Ms. Kanno’s role was just that.Kanno: No matter what project I am involved in, I believe it is always myJOBto show through music what the images cannot express. But almost always, once I hand over the score to the director, my job is over. It’s a one-way flow of my ideas. But this time around, I would tell them ‘I handled it in this manner and made it like this,’ and a response from Mr. Kawamori would come immediately. This is my first time doing a job that is not a one-way flow. So, to have been involved in this project, I am happier than anyone can imagine.
Then the Final Sound Mixing is done, and the anime is ready for screening!
Here’s a recap:
- Planning
- Concept Design
- Character Design
- Background (drawings) Design
- Key Animation
- In-between Animation
- Color Styling
- SFX Animation
- Editing
- Dubbing (voice)
- Sound Effects Editing
- Music selection
- Final Sound Editing
Thanks to Jay Hernandez, my cousins-in-law Jarlon and Riza Sison, and Soya Satoshi Sachou of TOEI Philippines for their hospitality and one very educational trip.
An introduction to anime cels
An introduction to anime cels
(technical FAQ)
| IntroductionI decided to write the following information to answer some frequently asked questions about technical terms related to cels. Please, note that I never worked in an anime studio and that I pieced together some information, especialy those concerning douga and genga based on discussion I had with several people. I don't promise that they are wholy accurate :) | |||||
Sample showing the "black lines" Back of the cel Front of the cel | What's a cel ?Cels (or celluloid) are painting on transparent plastic sheet used to create an animation. Each cel is one "frame". They are filmed and then put behind one another to give the illusion of a continuous motion. How cels are created ? There are many steps involved in the creation of an anime but I will just explain how cels themselves are created. First, a pencil drawing of the picture is made and "xeroxed" on a plastic sheet. I say "xeroxed" because it's the company Xerox that invented that method. In reality, it's a kind of photocopier or laser printer using photoconductivity to lay a powdered ink over the plastic sheet. Finally the cels are painted. It's done from the back of the plastic sheet, like those stickers you put inside of your windows to be looked at from the outside. Usually, when painting cels, the first step is to paint one colour on all the cels from a sequence. Then, when finished, the paint on the first cel has had the time to dry and is ready for the next colour. | ||||
Key cel (A1) from the opening | What's a key cel ?Each parts of an animation is broken down in many sequences, each representing a single action. In a sequence, some cels drawings are made by "key animators" while the rest is filled in by "normal" animators. Cels made by "key animators" are called "key cels". How to recognize a key cel ? "Key animators" draw the important "frames" of a sequence : The first frame, the last one and usually one or several middle frames. Each cel has a code written on it, composed of one letter followed by a number. The letter represents the layer of the cel. The number is the position of the cel in the sequence. The first cel has the number "1". The last cel can have any number (sometime even "1" for a sequence composed of a single cel) but is written "end" next to it. Those are "key cels". Based on an information from Stephen (blame him :), key cels have their sequence number "circled" on the pencil drawing. (and sometime on the cel itself) Example : A cel written "A1" is the first one of the sequence. A cel written "B34 end" is the 34th cel of the sequence and the last one. The "B" usually mean that it's the second layer of a multi-layer cel. | ||||
Why key cels are generally more valuable ?Because "key animators" are more renowned than normal animators. Also, as they have more experience, the drawings are often of better quality. It is said, that only animators with 10 years of experience are allowed to draw "key cel". But I personally don't agree with that : Often, because of the position of the characters, the first and last cels of a sequence won't be the nicest one, even if they may be technically better... | |||||
Multi-layers cel (A6/B4) | What's a multi-layers cel ?Some cels are composed of several plastic sheet (layers), each painted with one part of the whole picture. This is often used for group shot where each character is painted on a different layer. The reason is that you can animate one character by painting a new layer without having to re-paint the entire group. Often, especially for close-ups, the mouth, eyes and hairs of a character are also painted on a separate layer than the rest of the face. You can then "make the character talk" by painting just his mouth without re-painting the whole picture. | ||||
| |||||
What about background/foreground ?Background and foreground are usually watercolour on cardboard. Often, they are done by separate companies than the cels. Why don't we see many cels with background ? A whole scene may have the same background. That means that there are much more cels than backgrounds. | |||||
Sketch showing the sequence (draft) Genga (?) Matching drawing (douga) | What's a genga ?Genga are drawing of important scenes made by senior animators. They are then used as model by other animators to draw douga. A genga is never used directly to make a cel and is usually not available for sale. It's also possible to find drafts of genga (rough sketch) but usually they are not available on the market. Genga and their drafts are much more valuable than douga. What's a douga ? Douga are the "usual" drawing that comes with many cels when you buy them. They are used to make the cels. Are cels always sold with their matching drawing (douga) ? No, not always. It all depends of the studio that produced the anime. For example, AIC decided, a few years ago, to never sell their cels with the matching drawing. | ||||
| What's a timechart ?A timechart contains information about the position of a cel in the sequence and in the anime. They may also include information about who painted the cel. | |||||
| Why is a cel more expensive than another ?That's a difficult question : There is both technical and subjective criteria that define the value of a cel. Also some anime are more popular or rarer than others and so more expensive. Technically, a cel is more expensive if it's a close-up, if the character has both eyes open and if he/she is from the front, centered on the plastic sheet. Subjectively, a cel will be more expensive if the character has a nice expression, if it looks good... | |||||
Evangelion reproduction | What's a seri-cel (promotional cel) ?A seri-cel is like a normal cel (hand-painted over a plastic sheet) but was created for promotional purpose or to be sold. They are limited edition and are not used in the production of the anime. | ||||
Evangelion laser copy | What's a machine made cel (laser copy) ?Machine made cels (or laser copy) are more similar to laminated cards than to real cels. They are not hand-painted but printed with a machine over a transparent plastic sheet. | ||||
| What's a chroma-cel ?Chroma-cel is a trademark. They are similar to laser copies but use other techniques. They may be limited editions (I am not interested enough to check :) Contrary to promotional cels, they aren't hand-painted and as many copies of them can be printed. How to store cels ? The black lines of a cel are very sensitive to bright light and especially to UV. For that reason, it's very important to keep them out of sunlight. When storing them, you can use office binders. Also, you shouldn't stack too many cels or put something heavy over them : that's bad for the paint. Never put a cel directly over another one without putting at least a piece of paper between : the paint was designed to stick to the plastic sheet so both cels will get stuck and usually they can't be separated again without damaging the top one. For that reason, you should never try to separate the various layers of a cel. How to frame cels ? Once again, the important thing is to avoid UV. For that reason you should get anti-UV glass. Not all types of anti-UV glasses filter the same amount of UV. Also many are not fully transparent and will give a slight green or yellow hue to the cel. So check before if that bother you or not. There is also some spray that can be used to give an anti-UV coating to a normal glass. It's cheaper but less effective than buying special glass. Even if you got anti-UV glass, never ever put the cel under direct sunlight ! What if the pencil drawing is stuck to the cel ? If it isn't stuck too much, you can try to remove it very carefully. But if it's too hard, just let it be or cut the paper : Better to damage the drawing than the cel ! https://www.tokyo-anime.jp/lag/english/subject/animation.html | |||||








Comentarios
Publicar un comentario